Label Designs
This app of­fers two la­bel cre­ation modes: “Quick Type & Print” and the full fledged mul­ti-lay­er la­bel designer. A single purchase of the label design upgrade will unlock both creators.
“Quick Type & Print” is an easy option for printing la­bels by man­u­al­ly typing in ad­dress­es.

Choose this mode if you are looking for a fast way to just type and go straight to print.

To save labels, go to Toolbar > Export
To reopen saved labels, go to Toolbar > Import
Label designer supports both manual address entry as well as integration with Contacts. Use the label designer mode if you want to generate labels from Mac contacts or looking to create a fancy label design that contains multiple text boxes, photos and shapes.

To get started, "double click" inside the text box to enter your address. If the canvas is blank, you can add a new text box by drag-and-dropping the "Text box" object from the Inspector Panel to the canvas.

You can save multiple labels into a single project, to add a new label for new addresses, go to "Toolbar" > "Add New Label".

Please choose the Print > "All Labels" option to print a sheet of labels that contains different addresses.

The label designer mode supports multiple photos and layers. To add a photo to your label design:
  • Open inspector panel
  • Drag the "Photo" object to the canvas
  • Select the photo file you wish to add
  • Resize photo and move it to your desired location
  • To arrange photo layers, right click (control-click) on photo and choose "Arrange"
You can also drag any photo from Finders directly onto the canvas.
The canvas presents space for "one label", please try to size the font so the address occupies as much of the canvas space as possible.

Orion supports hundreds of label templates for a variety of label sizes and shapes. You can also create your own custom sized labels.

To switch to a different sized template, please go to Toolbar > "Design Type"

Default label for letter size paper:
The default template is compatible with Avery 5160. This is the 30 per letter sheet template, each label measures 2.62”x1”.

Default label for A4 size paper:
The default template is the 21 per A4 sheet template, Each label measures 63.5mm x 38.1mm (2.5" x 1.5").
You can create duplicates of your existing label design by going to Toolbar > "Label Listings" and choosing "Duplicate".
File Menu > Save

This action saves all label designs to a file with "orionlabel2" extension.

Reopen this file to make edits and re-prints.
Command bar > Export

This action saves the label sheet you are working on to a file with "labelsheet" extension.

To make edits and re-prints, import previously exported file back into the App by going to
Command bar > Import

Note:
This saves "one label sheet" at a time. If you have two pages of labels, this will need to be saved in two separate files (two "labelsheet" files).
  • Launch label designer
  • Select a label template to match the label papers you wish to use for printing. This app supports hundreds of different labels out of the box, if needed, you can also customize to create your own template. For letter size papers, the most commonly used label is the 30 per sheet address labels. (This is set as the default letter size template)
  • Customize font style, size, colors and add photos as desired
  • Go to toolbar > Contacts > select contacts and choose “Generate labels”
  • Go to toolbar > Print > “All Labels” to print labels
Generating from Contacts saves you time from typing in each address manually.

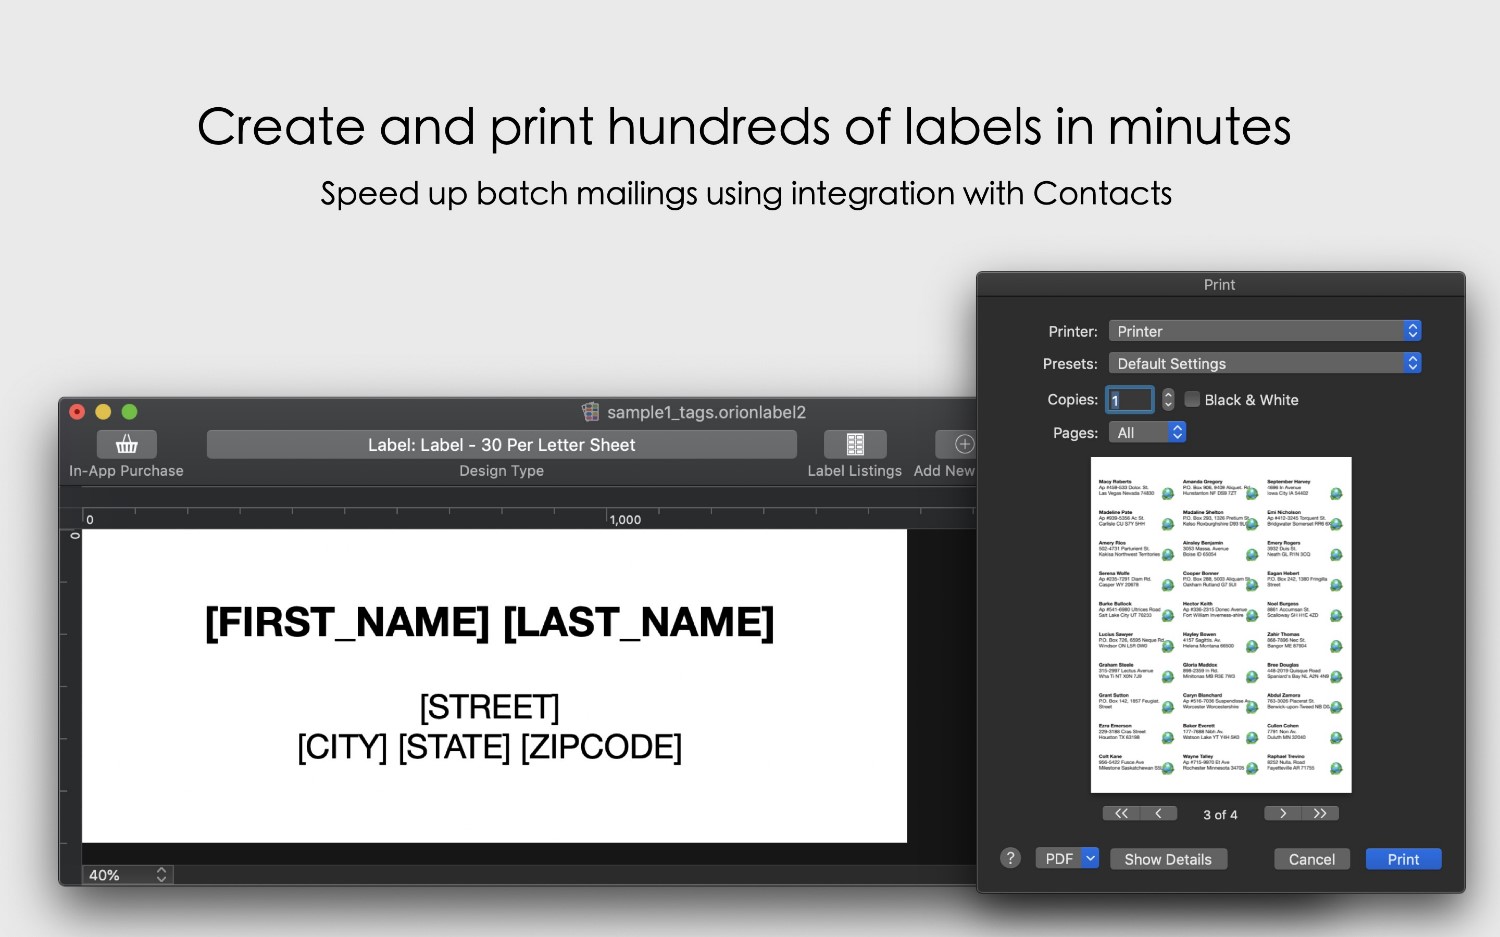
Use "Personalization Tags" as placeholders when designing a label template. When generating from Contacts, the personalization tags are automatically replaced with Contact data.

For example, the tag [FIRST_NAME] will be replaced with a selected contact's first name (such as "Sarah") when the app generates personalized tags. Choose the "Contacts" button from the toolbar when you're ready to select from Contacts.

Change label font style and formatting
If you are modifying labels generated from addresses saved in Mac's Contacts, you can modify the label template containing the personalization tags and then regenerate from Contacts. This allows you to make a single format change that will be applied to all labels.

Personalization tags are placeholders for where you wish to include information from contacts. You can mix and match personalization tags in your design.

If you're using a rich format text box, you can also apply different formatting to each tag.

[FIRST_NAME]
[LAST_NAME]
[TITLE] - contact prefix, such as Mrs. and Dr.
[COMPANY_NAME]
[JOB_TITLE]
[STREET]
[CITY]
[STATE]
[ZIPCODE]
[PHONE]
[EMAIL]
[HOME_PAGE]
[MIDDLE_NAME]
[NOTES]
You can enter information directly in Mac contacts or bulk import records into contacts.

Official instructions from Apple
Orion supports hundreds of label templates for a variety of label sizes and shapes. You can also create your own custom sized labels.

Steps for building your own custom template:
1. Launch label designer, go to Toolbar > "Design Type", choose "Build Your Own"
2. Select paper size (letter, A4 or 4"x6" mini sheet)
3. Select measurement unit (inch or mm)
4. Select label shape (rectangular/square, round or oval)
5. Count the number of labels on your custom template and enter the following label details:
  • Number of rows - this field accepts integers only
  • Number of columns - this field accepts integers only
6. Measure and enter label size and margin spacings, all of the following fields accept both integer and decimals:
  • Label width
  • Label height
  • Top margin
  • Bottom margin
  • Left margin
  • Right margin
  • Space between rows
  • Space between columns
7. Choose “Save” and confirm to apply new template